
Using the mini-editor
You will see this editor in several spots on the system - the icons at the top of the editor:
Expose Source
The Source icon will change the editing mode to show you the source HTML code. In some cases you may need to do this.
Source of the above reunion text looks like this:
<span
style="font-size:larger"><span
style="font-family:arial"><strong>Welcome to the Abercrombie
family reunion registration
site</strong></span></span>.<br />
<br />
We are looking forward to a large gathering this year. Our reunion will
be held at the Holiday Inn in Estes Park Colorado (800-315-2621). Your
registration includes Friday night reception with a cash bar and a
Saturday night banquet at the Holiday Inn. The banquet will feature
entree choices of beef, chicken and grilled salmon. We will want you to
indicate your choice on the registration form. You may register multiple
family members on the same registration form. Just pick the quantity of
each registration type below. You do not need to register children aged
5 and under.<br />
<br />
We have also arranged for an optional Saturday bus tour of Rocky
Mountain National Park. Please indicate on the registration form if you
would like to participate. This is a four hour tour, departing at 8:00
am, price is 15.00 per person.<br />
<br />
We are looking forward to seeing all of you again - the last reunion was a huge success!<br />
If I want to reference another document with a 'click here' type link, I would have to (however briefly) expose the Source.
The general method of including a document reference is to use this model:
<a href=" ---- link goes here ----" target="_new">--description of download--</a>
I have used the Upload files to upload a pdf file that contains my Code of Conduct.
I asked for the link in my Upload files:
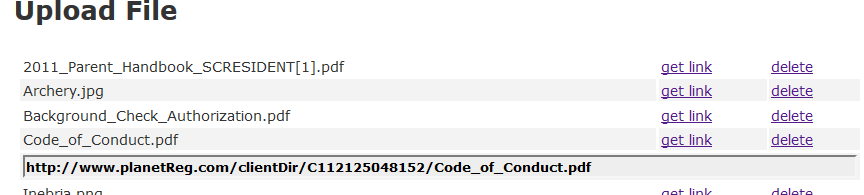
and was provided with this link:
http://www.planetReg.com/clientDir/C112125048152/Code_of_Conduct.pdf
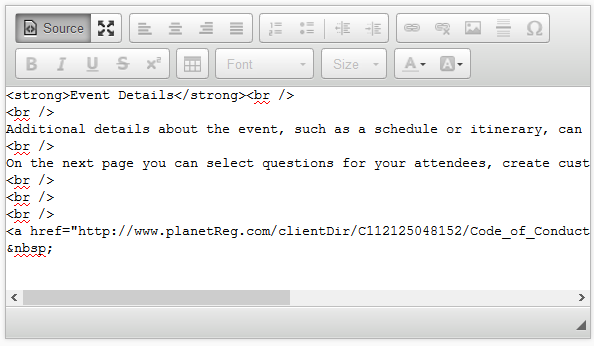
The best way to construct my final entry is to use a program like Notepad to set it up:
<a href="http://www.planetReg.com/clientDir/C112125048152/Code_of_Conduct.pdf" target="_new">Code of Conduct</a>
There is no problem setting this up directly in the panel I am editing, it's just easier to use Notepad.
I ask to expose Source, copy and paste this entry in the appropriate spot:
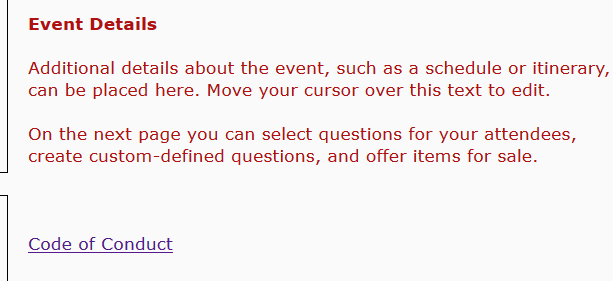
The final look - after I save the edited panel looks like this:
The icon that shows four arrows pointing to four corners will turn your editing space into a full screen mode - can be easier to handle if you have some dense text.
Justify Lines
The next four icons allow you to justify lines of text - Left, Center, Right and Justify. What Justify does is to add extra spaces to your text lines so they come out perfectly aligned right and left:
The middle paragraph is 'Justified':
Bulleted and Numbered Lists
The next 2 icons showing numbers 1 and 2 as well as bullet points allow you to create numbered or bulleted lists:
The next two icons allows you to indent parts of your text (the second icon) or remove the indent (the first icon). This text is indented.
Links
The icon that looks like a chain link is used to insert a link to an external file. Click that icon and you will see this dialogue:
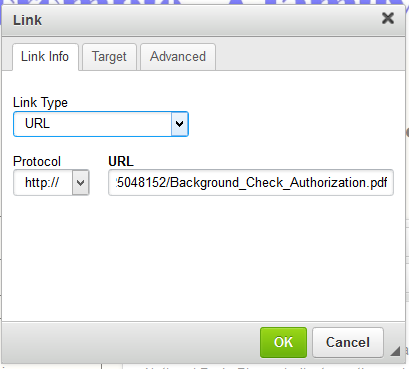
You can paste in a URL (like above) - in this case a .pdf file that we have loaded for retrieval - See Upload files.
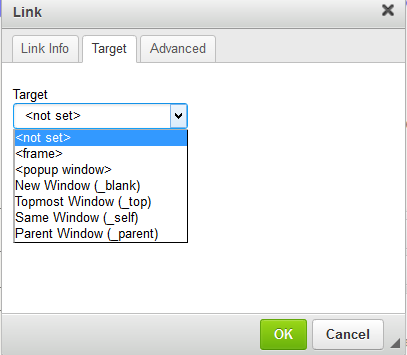
If you click on the Target Tab, you will be able to choose how the link will be displayed. Usually the best approach is to choose a 'New Window'.
Note that this is an alternate way to show additional documents on your form without exposing the source. It has the disadvantage that the final result will be a raw link showing on the page:

The results are identical - click the link to see the pdf - but the first method looks nicer.
Image
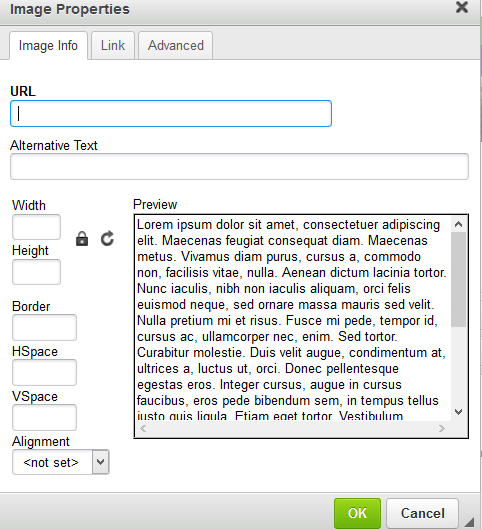
The next icon - looks like pair of mountains - can be used to insert an image into the panel:

We have pasted the link to an image we have uploaded using Upload files and the image is displayed:
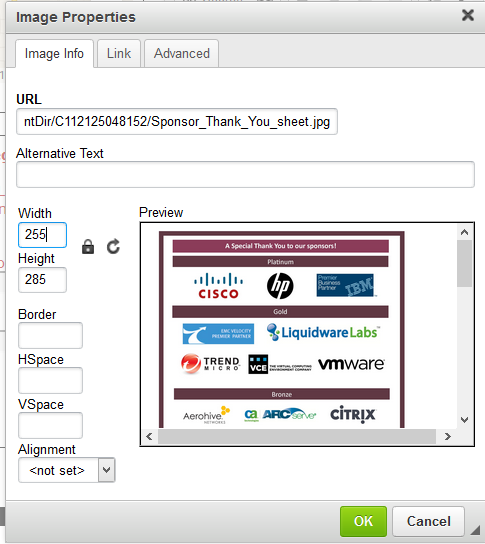
If the image is too large or too small, you can adjust the width and/or height as shown.
If you want to edit the image after saving it, just edit the panel, click on the image and then click on the image icon (the mountains).
This is how our final panel looks:
Horizontal Line
The next Icon - showing a bold line amid lines of text allows you place a horizontal line in your panel.

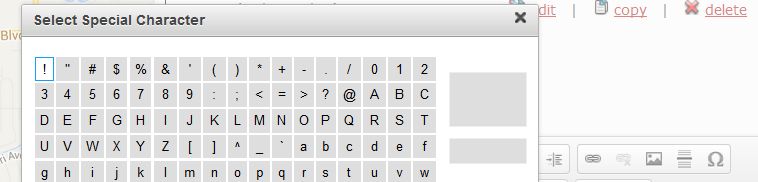
Insert Special Character
The Omega symbol at the end of the icon panel will allow you to insert a special character into your text:
The second line of icons have to do with the type, size and color of your text and are pretty self explanatory.
Table
The only icon that looks somewhat mysterious is the insert table icon:

When you click the table icon you will see:
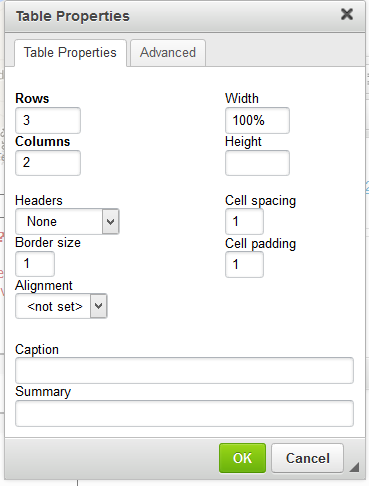
You can enter the number of rows and columns needed for your table. In this case 3 rows and 2 columns:
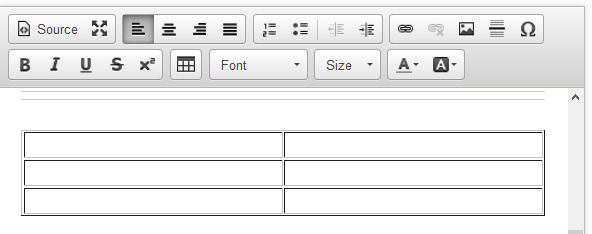
When you key into the cells, you will notice that the cell boundary moves - key in row 1, cell 1 and the boundary moves right. To offset this, just key data into row 1, cell 2 and the center line will move left.
You can enter spaces at the end of either cell to align the center line:
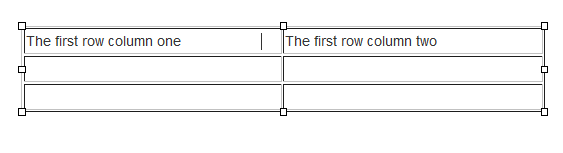
It is a bit like pushing down on a bowl of jello, but it can be done. Once your first row has been entered and aligned, subsequent cells can be entered without a problem:
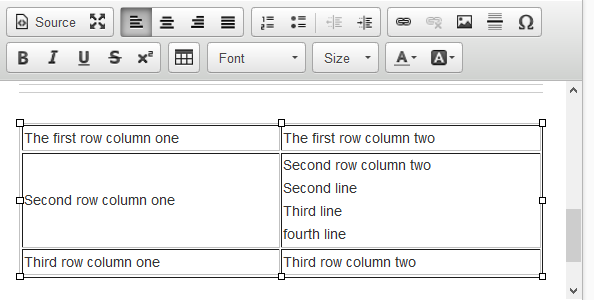
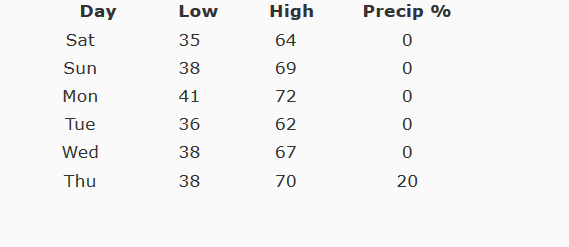
You can also use the table insert to create a columned list of values - without looking like a table.
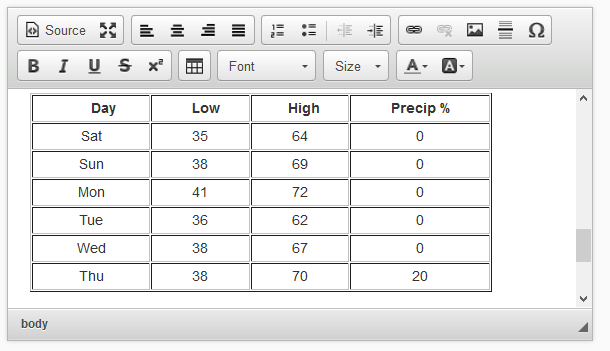
This is a simple table of temperatures by day - note that I pointed to each cell value and used the center icon on the top row of icons to center each value:
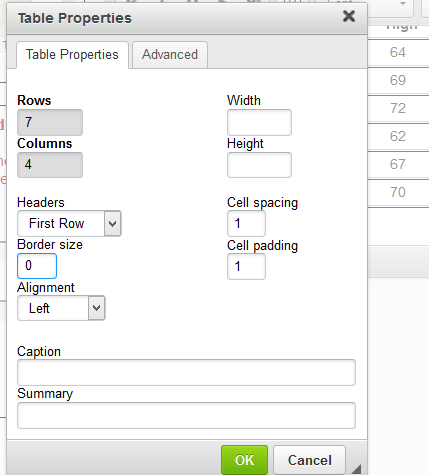
I can alter the look of the table by changing the border size to zero - just put your cursor anywhere in the table, right click and click on Table Properties:
After I save and review the panel, it looks like this:
Occasionally you may need to enter accented characters. If you find that your keyboard is not able to reproduce the character, if you are using Windows, you may be able to the Windows Character Map:
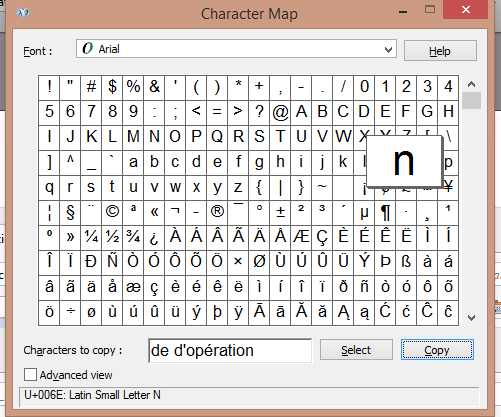
In the example above, the Characters to copy box has been filled with characters, including an accented é.
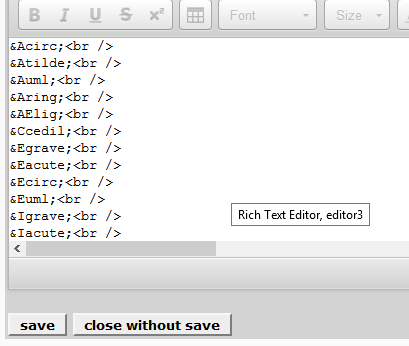
Another approach is to insert the html code for accented character by exposing the Source (see above). Here is a table of html codes for accented characters:
http://www.ascii.cl/htmlcodes.htm
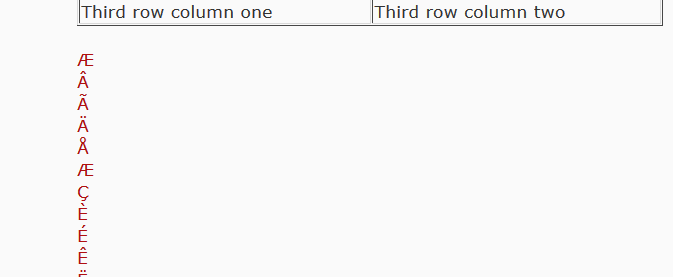
The above panel uses html codes as shown in the link above.
And appears:
See also